PHOTOGRAPHING THE AURORA
A camera is the single best aurora instrument you own — this observatory literally grades its renderer against 486 star-calibrated photographs. This chapter is the practical half of that respect for the frame: settings that work on phones and dedicated cameras, what the colors honestly mean, and how a photo with stars in it can graduate from souvenir to measurement. For finding the aurora in the first place, start with how to see it.
Why your camera beats your eyes
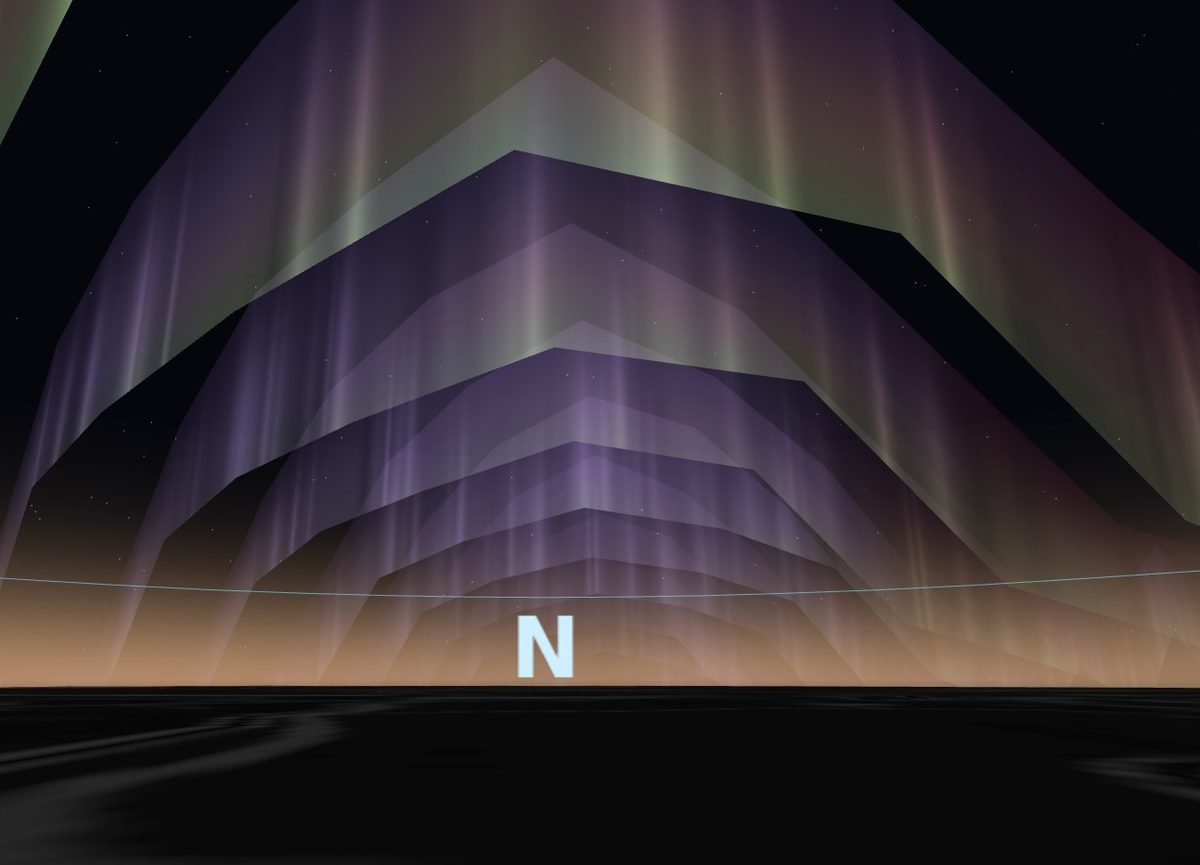
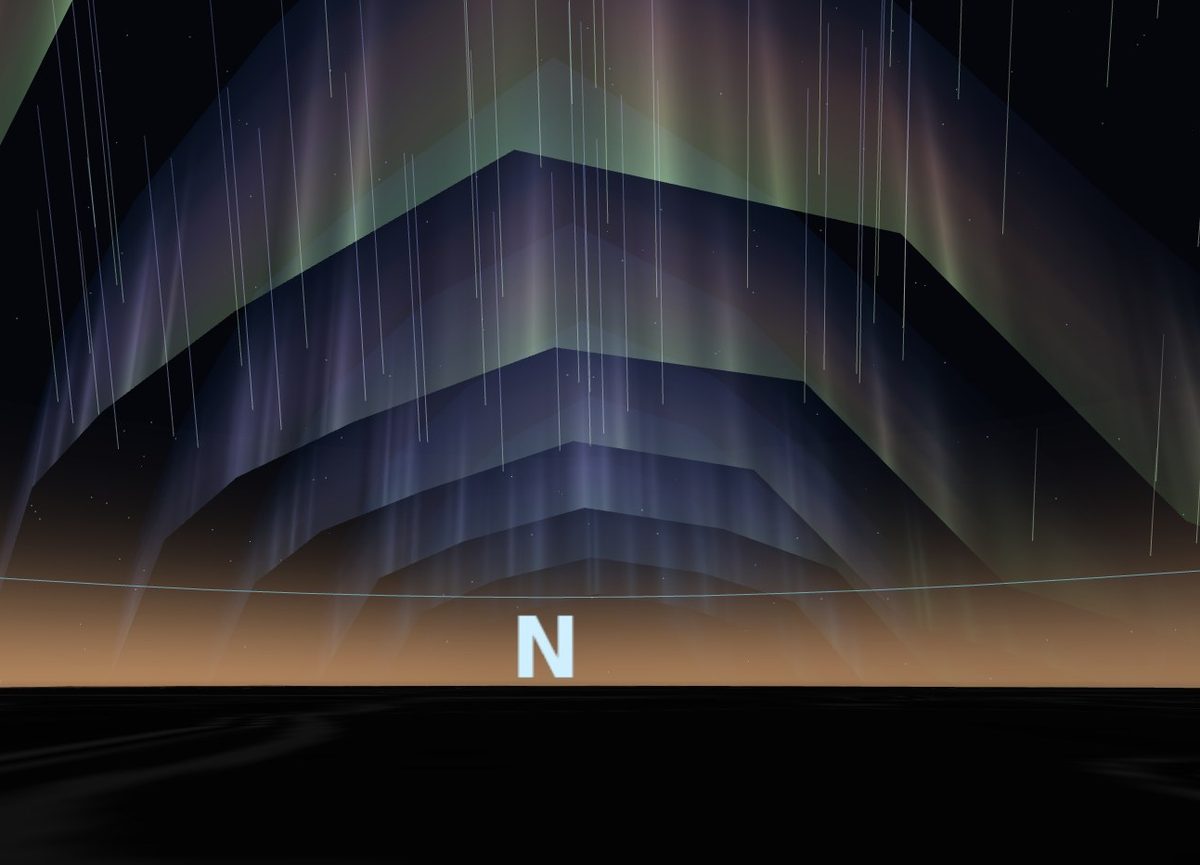
Dark-adapted human vision runs on rod cells with a hard floor near ~1 kilorayleigh of green — below it nothing, just above it a gray veil — and rod sensitivity collapses toward the red end of the spectrum, so faint aurora reads colorless even when a display is plainly there1,2. A camera has neither limit: it integrates light for seconds and amplifies it electronically, so it records color and structure that physiologically cannot reach you. Neither view is a lie; they are different instruments. The observatory renders both, and the pair below is the same simulated sky at the same minute:
Phones: night mode is made for this
- Steady beats everything. Night mode stacks several seconds of exposure; any wobble smears it. Tripod, fence post, car roof, or elbows braced on a rock — then use a 2–3 s shutter delay so your tap doesn't shake the frame.
- Let it run long. If your phone offers a manual night-mode duration, use 3–10 seconds pointed at the sky. A faint glow your eyes can't confirm resolves instantly — the quickest aurora detector there is.
- Focus is the classic failure. Tap a bright star, distant light, or the moon and lock focus (press and hold on most phones). Autofocus hunting in the dark ruins more aurora frames than noise ever will.
- Turn off flash and skip the ultrawide when light is marginal — ultrawide modules usually have smaller apertures and noisier sensors. Main lens, wiped clean (dew forms fast on cold nights).
- Shoot RAW if offered. Night-mode JPEGs bake in aggressive processing; RAW keeps the color decisions yours.
- Cold kills batteries. A phone that dies at 40% in the pocket dies at 80% on a tripod in −10 °C. Keep a warm spare bank.
Dedicated cameras: a starting recipe
Every aurora night is different, but this recipe gets a keeper on the first try, then you adjust:
| Setting | Start at | Why |
|---|---|---|
| Lens | Widest you own, f/1.4–f/2.8 | The show spans half the sky; aperture buys you shorter exposures |
| ISO | 3200 | Range 1600–6400; noise is fixable, motion blur isn't |
| Shutter | 5 s | Drop to 1–3 s in fast displays — rays move at kilometers per second and long exposures smear them into mush (the shapes are the point) |
| Focus | Manual, on a star in live view | Magnify a bright star and rack focus until it's a point; tape the ring |
| White balance | Fixed, 3500–4000 K | Auto WB drifts frame to frame and ruins timelapses |
| Format | RAW | Aurora spans a huge brightness range; keep the headroom |
Trust the histogram, not the screen — an LCD at night looks two stops brighter than the file. If the green channel is climbing the right wall, shorten the exposure: a blown 557.7 nm line takes the structure with it. And during a substorm breakup, just shoot — the best ten minutes of the night doesn't wait while you fiddle.
The color argument, settled honestly
Every big storm restarts the same fight: "it never looked like that." Both sides are half right. The camera measured real photons — the color is physically there, at wavelengths and intensities your rods discard2. But a heavily saturated frame presented as experience misleads people into driving three hours for a sky their eyes will render gray. The honest move is to label which view a picture shows — which is exactly why this observatory carries both a camera view and a naked-eye model, and why the citizen-science color reports from the May 2024 storm (green overhead, red only where the display ran bright) are wired into it3.
Make your photo an instrument
A frame with visible stars carries a complete pointing solution: where the camera stood, where it aimed, what angle of sky every pixel covers. That's how 486 citizen photographs became this site's measurement corpus — fitting real border heights (110–360 km) and even triangulating the auroral base at 99 ± 5 km from two same-minute frames taken 122 km apart. If you catch a display worth keeping:
- Keep the stars in frame and some horizon if you can — that's the calibration.
- Get the clock right. Set the camera's time (and timezone) before the night starts; the star solution is only as good as the timestamp.
- Keep the original file. EXIF is data — capture time and lens metadata ride along.
- Send it in. The live sky's 📤 share flow feeds the corpus — exact coordinates are used only for calibration, and the public map shows nothing more precise than ~10 km, on a separate opt-in (the exact terms). The next superstorm's reconstruction will be graded against frames like yours.
Frequently asked questions
- Why did my photo show purple and pink I never saw?
- Two instruments, two answers. Pink/purple fringes are nitrogen emission lit low in hard-driven displays (the shapes chapter covers why); they're real but usually too dim and too red-adjacent for dark-adapted eyes, which are nearly blind to deep red2. The camera integrates seconds of that light and hands it back saturated.
- What are the best phone settings tonight?
- Night mode at 3–10 seconds, phone braced or on a tripod, focus tapped-and-locked on a bright star, flash off, main lens wiped. If a glow is suspected but invisible, one 5-second frame pointed north answers it.
- Do I need a tripod?
- For a 3-second confirmation shot, bracing works. For 10-second exposures, timelapses, or anything you'd print — yes, and a shutter delay or remote so pressing the button doesn't shake the frame.
Sources
Numbered references for the claims above, DOI-verified. Entries marked in the renderer are also implemented — their formulas or thresholds run as code in this observatory's engine (the data & methods page lists the full implementation set).
- Steele, D. P. & McEwen, D. J. (1990). Electron auroral excitation efficiencies and intensity ratios. J. Geophys. Res. 95, 10321–10336. doi:10.1029/JA095iA07p10321in the renderer
- Chamberlain, J. W. (1961). Physics of the Aurora and Airglow. Academic Press. The International Brightness Coefficient scale: IBC I ≈ 1 kR at 557.7 nm; rod (scotopic) response and its red-end collapse.in the renderer
- Grandin, M. et al. (2024). The Gannon Storm: citizen science observations during the geomagnetic superstorm of 10 May 2024. Geoscience Communication 7, 297–316. doi:10.5194/gc-7-297-2024in the renderer
By The Space Weather Observatory · checked against the data & methods record · Updated August 21, 2026
the sky · the sun · field guide · data & methods · about · privacy · pro · ☁️ seasonmap · ☕ support